The SELLERLOGIC Platform offers a suite of services that share some common features of table management. This document outlines the key functionalities related to table management, such as sorting, filtering, and table settings.
Sorting data
Table data can be sorted by the values in a specific column, either in ascending or descending order.
Click on the three-line icon within the column header filter and choose the desired sorting option:
Ascending: Sort from A to Z (smallest to largest values).
Descending: Sort from Z to A (largest to smallest values).
Columns with sorting enabled are indicated by a corresponding sorting icon. It's important to note that sorting can be applied to only one column at a time.
Filtering data
Filtering allows you to narrow down the data displayed in a table by selecting specific values within column headers. Multiple column filters can be applied simultaneously.

Reset filters
To clear all applied filters for table columns, click on the funnel icon located at the beginning of the column header row. This action will restore the column filters to their default state, but any sorting applied to the columns will remain unchanged.
Live search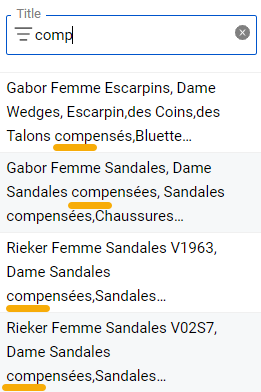
Live search functionality enables you to search for specific keywords within a column dynamically.
When selecting the column header filter with the live search option, it becomes an input field. Enter your search keywords (whole or partial) into the input field and the table will update in real time to display only those entries that contain the filtered value within the column with the filter enabled.
NA: To filter entries with no values or 0 values within a column, type “NA” into the corresponding header filter.
 Numeric filtering
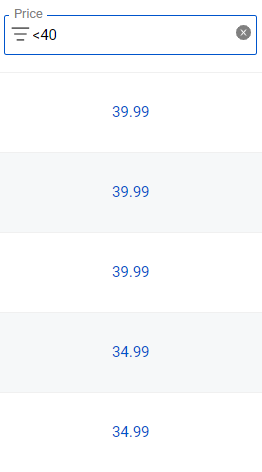
For columns with numeric values, live search offers additional filtering options using comparison operators:
-
<(less than) -
<=(less than or equal to) -
>(greater than) -
>=(greater than or equal to) -
<>(not equal to) -
=(equals)
Note: There is a filtering deviation of 0.01 when comparing numeric values.
Repricer filters
The Repricer “My products” table offers additional comparison options to perform more advanced filtering operations on pricing data within the following columns:
Price | Recommended retail price | Initial price | Lowest price | Buy Box price | Breakeven | Current profit | Min price | Max price | Buy Box threshold price | Net purchase price | Amazon referral fees (%) | Other fees | Standalone price | Former selling price | FBA fees / Shipment fee
For more information about Repricer “My products” table, see Repricer | My products | Table.
Comparison options
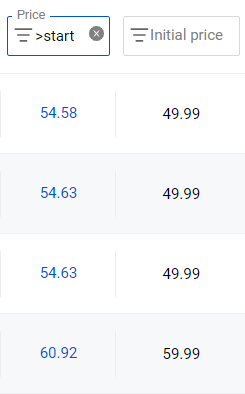
Start: To compare values of the column with the “Initial price” value, input a corresponding comparison operator (<, <=, >, >=, <>, =) and type start in the header filter.
Best: To compare values of the column with the “Lowest price” value, input a corresponding comparison operator (<, <=, >, >=, <>, =) and type best in the header filter.
Buybox: To compare values of the column with the “Buy Box price” value, input a corresponding comparison operator (<, <=, >, >=, <>, =) and type buybox in the header filter.
Thp: To compare values of the column with the “Buy Box threshold price” value, input a corresponding comparison operator (<, <=, >, >=, <>, =) and type thp in the header filter.
Min price & Max price
To filter products with the “Min price” or “Max price” values assigned, type AT in the corresponding column header filter.
Business Analytics filters
SKU: The SKU filter in Business Analytics allows you to search for multiple SKUs in a single query. To use this filter effectively, follow these guidelines:
-
Multiple SKUs: To filter multiple SKUs, type the SKU values in the "SKU" column header and separate them with a comma. For example, to search for SKUs "12345" and "67890", enter:
12345, 67890 -
Commas within SKUs: If an SKU itself contains a comma, you should enclose that SKU value in parentheses to distinguish it from the delimiter. For example, to filter SKUs "A,12345" and "B,67890", enter:
(A,12345), (B,67890)
Date picker
 The date picker allows you to filter data based on a date or date range. It provides a calendar interface and predefined periods for easy date selection.
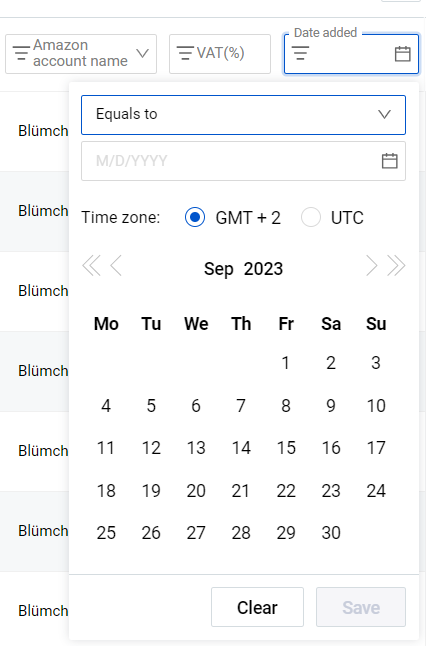
Select the column header filter with the date picker to open the calendar form. Navigate through the calendar using the arrow icons (one arrow switches the month, a double arrow switches the year).
You can input an exact date or choose from predefined periods within the dropdown list opened upon a click on the down-arrow icon. Below is a table listing all predefined periods available within the date picker forms, along with their respective descriptions.
| Period | Description |
|---|---|
| Equals to | A certain date. |
| Previous | A certain number of days/months/years prior to the current date. |
| Between | A certain period between two dates. |
| After | All dates following the defined date. |
| On or after | The defined date and all dates following it. |
| Before | All dates prior to the defined date. |
| On or before | The defined date and all dates prior to it. |
| Last 7 days | 7 days prior to the current date. |
| Last 14 days | 14 days prior to the current date. |
| Last 30 days | 30 days prior to the current date. |
| Current month | All days in the current month. |
| Last month | All days in the previous month. |
| All-time | All available dates. |
Time zone
Some date picker forms allow you to select the time zone:
GMT +2: This is the time zone that is 2 hours ahead of Greenwich Mean Time (GMT). It is shared by countries on three continents: Europe, Africa, and Asia.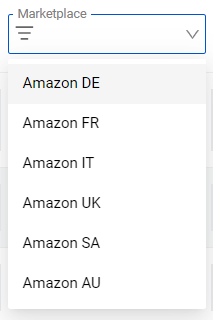
UTC: This is Coordinated Universal Time and the primary time standard by which the world time is regulated.
Dropdown list
The dropdown list filter provides you with a range of possible values for selection. You can filter table information by choosing from the available options in the list.
Table settings

“Table settings” allow you to customize the sizes of table columns according to your preferences.
To adjust the column width, click the “Table settings” button at the lower right corner of the table page. Locate the split arrows icon between the desired columns, drag and drop it to set the new column width. Click the “Close” button (with the X icon) at the lower right corner to save changes and exit “Table settings”.
Use the “Reset to default” button (with the circle arrow icon at the lower right corner) to revert column widths to their initial settings.
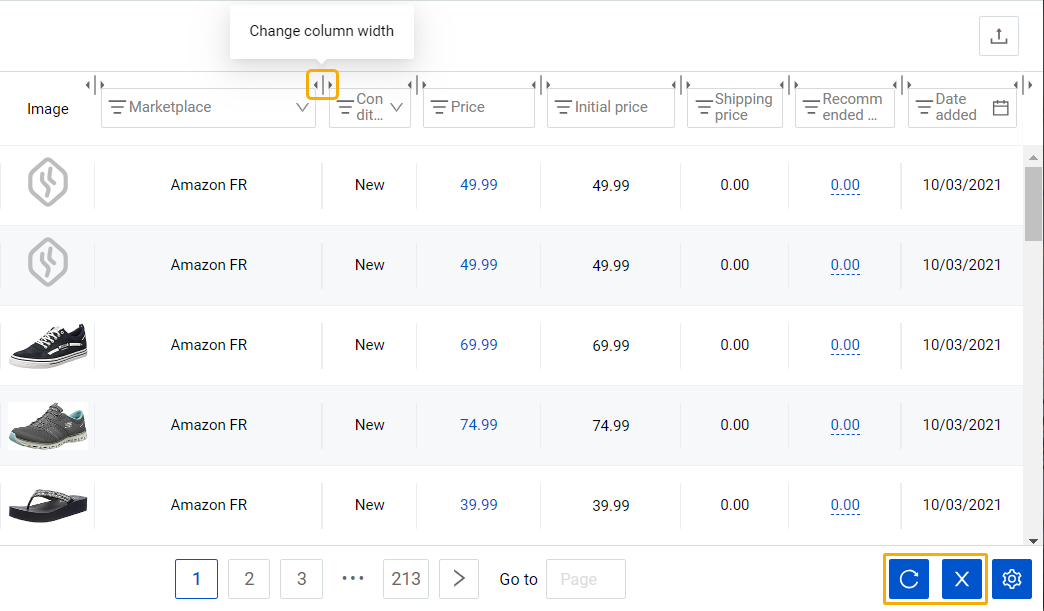
Table content

The "Table content” drawer lets you customize which columns appear in the table and arrange their order. Open it by clicking the “Table content” button in the page footer.
The drawer contains a "Column settings” section that lists all available columns. A "Pinned” counter in the drawer header shows how many columns are currently pinned to the left side of the table.
Customization options
Showing and hiding columns
Each column has a checkbox on its left side:
- Checked (blue tick) — the column is visible in the table.
- Unchecked — the column is hidden from the table view.
You can show or hide any combination of columns independently.
Pinning columns
Each column has a pin toggle (a switch with a pushpin icon) on its right side. Enabling the toggle fixes the column to the left edge of the table, keeping it visible as you scroll horizontally — useful for key reference columns such as IDs or names.
The "Pinned X/Y” indicator in the drawer header updates in real time, showing the number of currently pinned columns (X) out of the total column count (Y).
Reordering columns
Each column row has a drag handle (a 6-dot grid icon ⠿) on its far left. To reorder columns:
- Click and hold the drag handle on the row you want to move.
- Drag the row up or down to the desired position within its group.
- Click "Apply” to confirm the new order in the table.
Applying and resetting changes
At the bottom of the drawer, two buttons control your changes:
- Apply — Saves all current settings (visibility, pin state, and column order) and immediately updates the table layout.
- Reset — Reverts all settings to the system defaults, discarding any changes made since the last apply.
Closing the drawer
To close the drawer without applying unsaved changes, click anywhere outside it or use the ✕ button in the top-right corner. Any previously applied settings remain in effect.