To start using Lost & Found, enable the service for one or multiple Amazon accounts by following the steps of the Lost & Found setup wizard described below.
Step 1: Launch the setup wizard
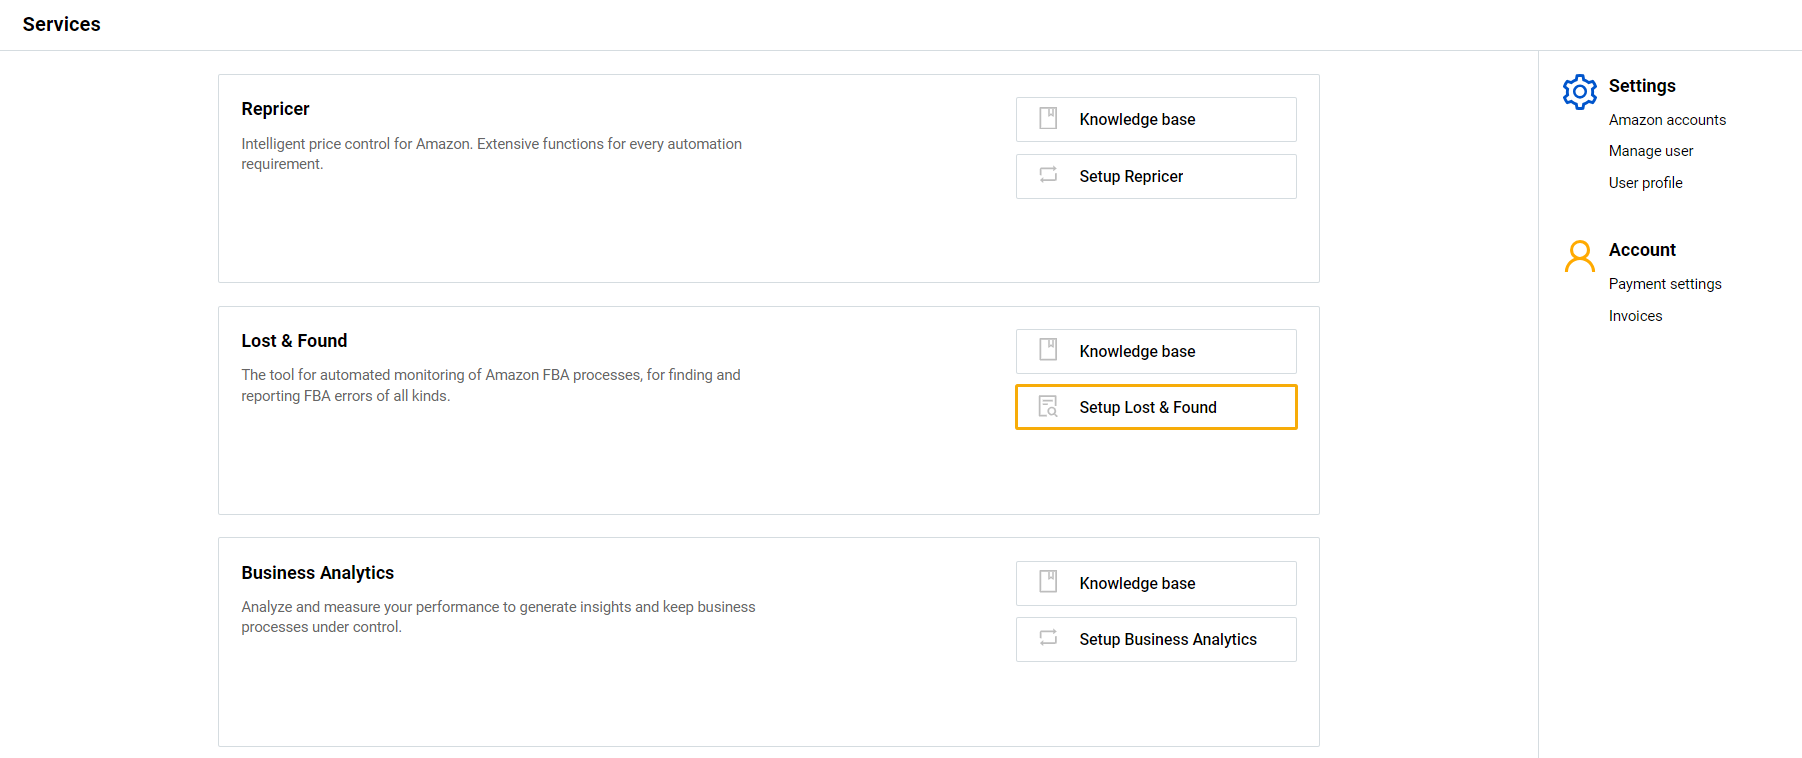
- Go to the SELLERLOGIC Homepage.
- Navigate to the Lost & Found panel and click “Setup Lost & Found”. This action will launch the Lost & Found setup wizard.
Alternatively, you can launch the Lost & Found setup wizard by clicking on the “Add/restore account” button on the “Amazon seller account management” page. For more information, see Lost & Found | Amazon seller account management.
Step 2: Review terms and conditions
If not done before, you will be prompted to read and accept the "Lost & Found terms and conditions". To agree and accept the terms and conditions, click the “Setup to Full-Service” button.

Step 3: Provide the payment information
If not done before, you will be prompted to provide your payment information. Fill out the fields in the “Billing information” modal form with the following details:
Email: Enter a valid email address.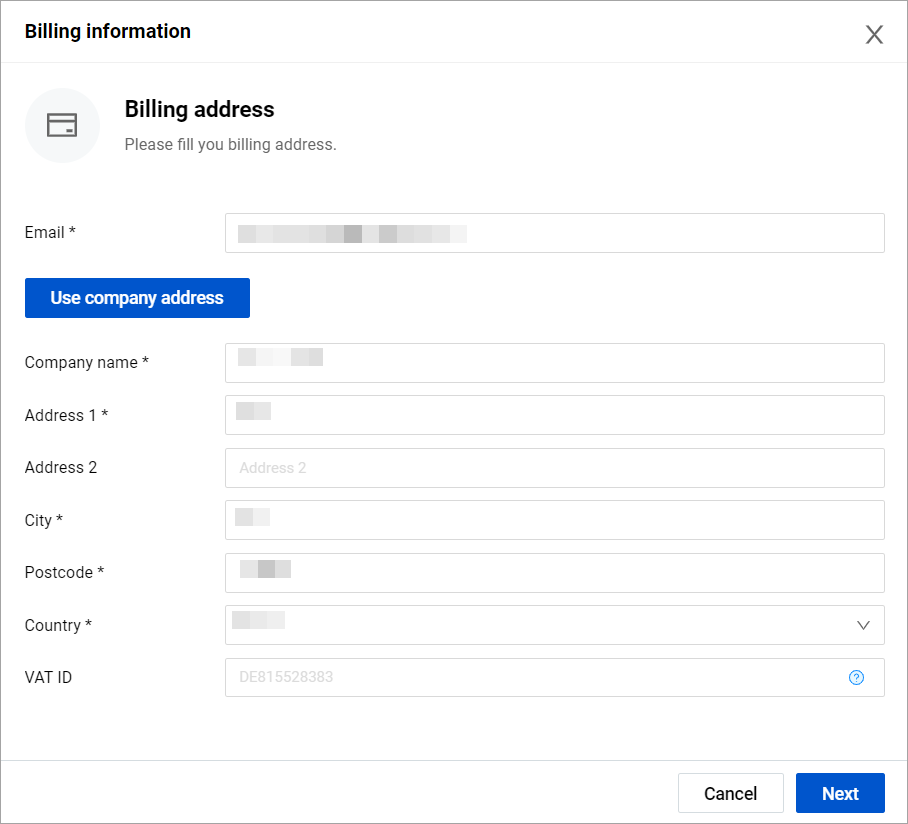
Tip: Select “Use company address” to apply autofill for the following fields.
Company name: Enter the title of your business entity.
Address 1: Enter the billing address of your business entity.
Address 2: Enter the alternative billing address of your business entity (optional).
City: Enter the name of a city/town of your billing address.
Postcode: Enter the postal code of your billing address.
Country: Enter the name of the country of your billing address.
VAT ID: Enter the valid value-added tax (VAT) identification number of your business entity. Note: If no valid VAT ID is entered, your invoice will contain the currently valid German VAT.
Click “Next” to proceed.
.png)
If your billing address is located in Germany or Austria, you will be asked to enter your SEPA details and sign the debit authorization form accordingly:
Account Holder: Enter the name of the entity owning the account.
IBAN: Enter the IBAN number of an account.
The rest of the fields will be automatically filled based on your IBAN provided.
Sign the debit authorization form by selecting the checkbox below and click “Next”.
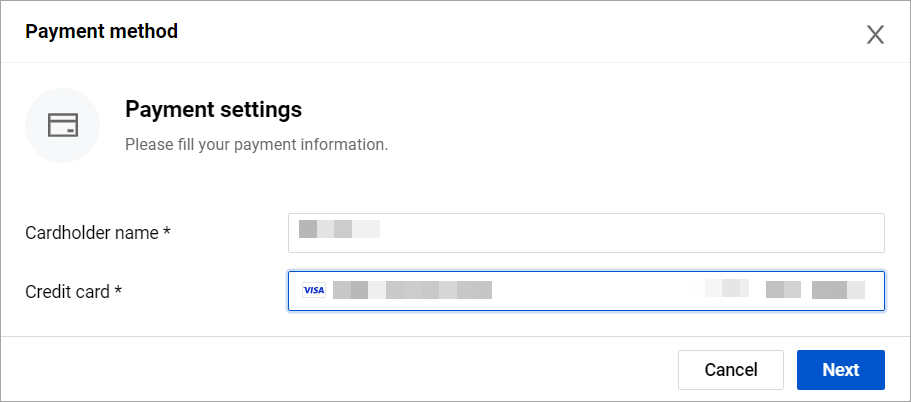 If your billing address is located in countries other than Germany or Austria, you will be asked to fill out the payment information form with the credit card details that will be used as the payment method:
Cardholder name: Enter the name specified on the credit card.
Credit card: Enter the credit card number and click “Next”.
Step 4. Connect your Amazon account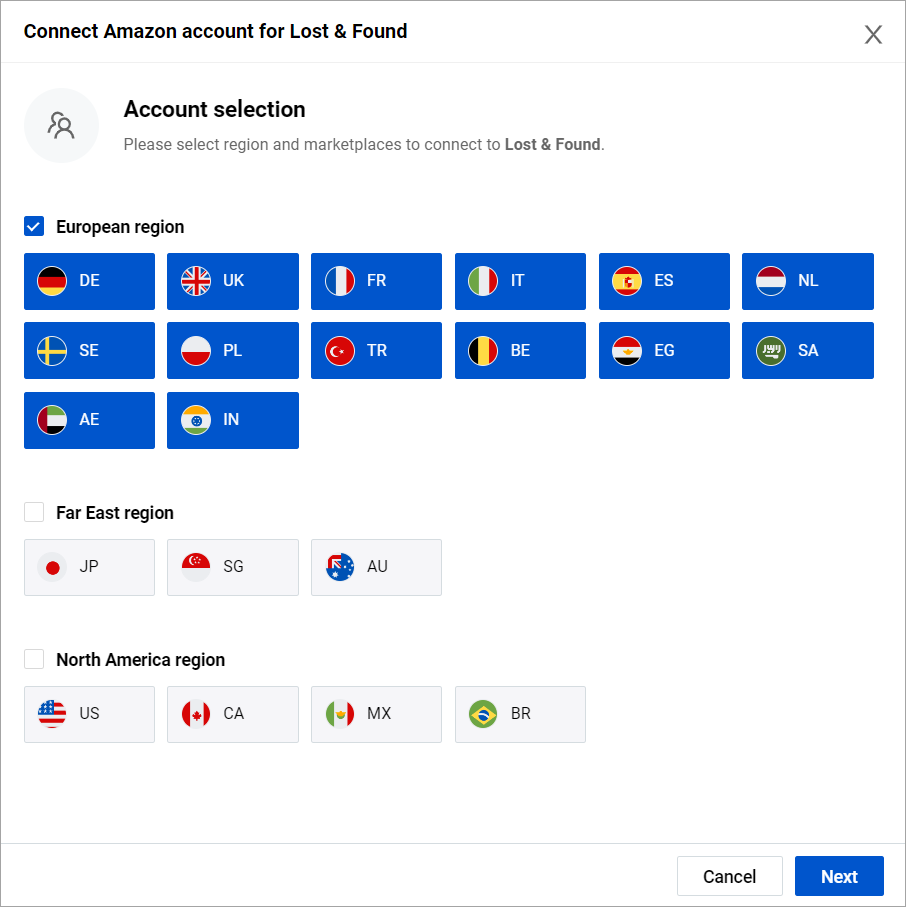
If you want to enable Lost & Found for a new account, or you have no Amazon accounts connected to SELLERLOGIC, follow these steps:
- Select the region of your Amazon account to have all its marketplaces connected to Lost & Found. Note: Only one region can be selected.
- Click “Next”.
- Select the home marketplace to match your Amazon account home marketplace. Info: This marketplace and its currency will be used as the default for this account when using Lost & Found.
- Click “Next” to proceed.
If you have previously connected your Amazon account to SELLERLOGIC, you will be offered to select the account from among the existing ones.
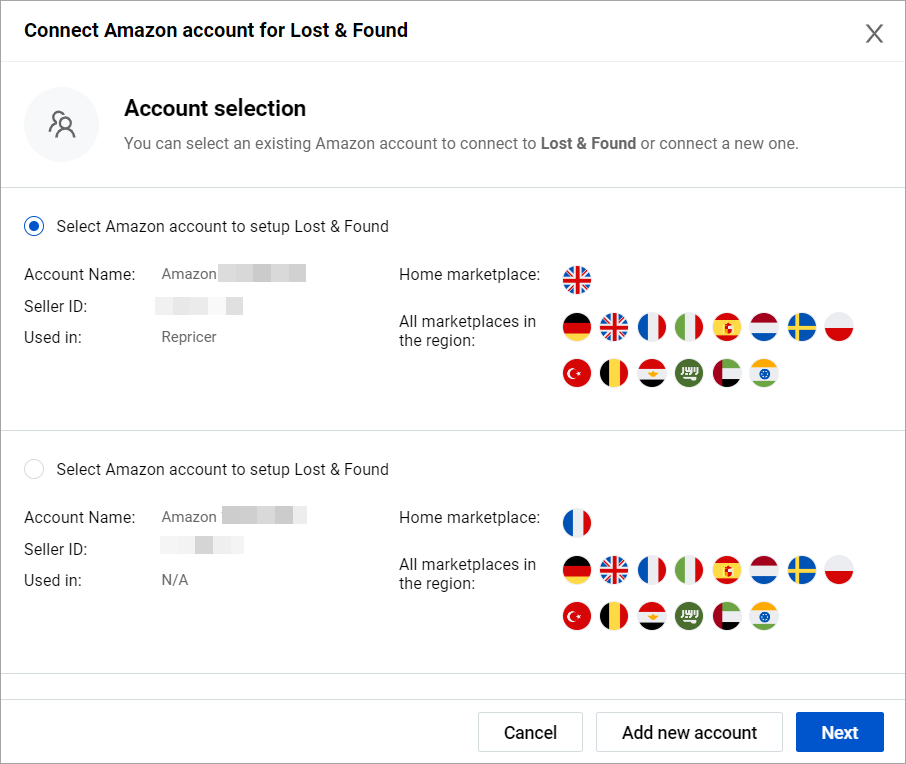
The “Connect Amazon account for Lost & Found” form provides a list of all your Amazon accounts that are connected to the SELLERLOGIC Platform along with the account details and information about the enabled SELLERLOGIC services. If you want to enable Lost & Found for an existing account, follow these steps:
- Select your Amazon account to be enabled for Lost & Found.
- Click “Next” to proceed.
If the account you want to enable for Lost & Found is not listed within the “Connect Amazon account for Lost & Found” form, select “Add new account”.
Step 5: Sign in to your Amazon account on Seller Central
If your Amazon API token is not provided or expired, you will be prompted to sign in to Amazon Seller Central for the token provision.
- Provide the required information and sign in on the Amazon Seller Central authorization page.
- Follow any on-screen instructions provided, to access the Amazon API token and return to the Lost & Found setup wizard.

Note: If an error message appears during the account connection process, follow the instructions in the message or click “Back” to return to the previous setup wizard step.
Step 6: Specify your FBA settings
If not done before, you will be prompted to specify your FBA settings.
Info: This step is shown only if your account is located within the “European region”, selected during step 4.
In the “Fulfillment by Amazon settings” modal form, provide your current FBA settings as follows:

- Select the countries where your inventory is allowed to be stored by checking the relevant country checkboxes. The country of your home marketplace is checked by default and cannot be unchecked. If your home marketplace has no FBA storage, there will be no default country and you can choose it manually.
- If one of the selected countries is Germany (DE), two additional options will be shown. Use the radio button to select whether to store in Germany only (with the additional fulfillment fee) or to store in one of the program countries – Germany, Poland, or the Czech Republic (saving up to €0.26 on the fulfillment fee).
- Set the date when the FBA fulfillment fee for the selected FBA settings becomes effective (optional).
- Click “Save” to proceed.
Step 7: Sign th e DPA contract
If not done before, you will be prompted to sign the SELLERLOGIC DPA contract.
- Read the terms and conditions of the DPA contract and click “Accept”.
- After accepting the contract, the “Download” button appears. Click “Download” to save the contract on your PC. Once you have signed the contract, it will be available for download at any time within the SELLERLOGIC Platform. For more information, see SELLERLOGIC | Privacy.
- Click “Finish” to proceed.
Step 8. Add SELLERLOGIC as a Limited User
To add SELLERLOGIC as a new user of your Amazon seller account, follow these steps:

- Log in to your Amazon Seller Central account by clicking the "Sign in” button provided by the “Add SELLERLOGIC as a Limited User for Lost & Found” modal form. Ensure you have administrative permissions for the Seller Central account to continue.
- Access Seller Central "Settings” > “User Permissions” page and navigate to the “Add a new user” section.
- Fill out the fields of the “Add a new user” section with the following parameters:
- Name: input “SELLERLOGIC”
- Email Address: input the email address provided within the “Email” field of the “Add SELLERLOGIC as a Limited User for Lost & Found” form.
- Select the preferred language in the "Language” field and click the “Invite” button on the Seller Central “User Permissions” page.
- In the new window, when prompted whether the user can create reimbursements in the account, select "No" and confirm the setting by pressing the button below.
To proceed with the wizard, click the "Confirm” button within the “Add SELLERLOGIC as a Limited User for Lost & Found” form. Alternatively, assistance can be requested by clicking the "Contact support” button.
Step 9. Confirmation for Lost & Found
Next, you will encounter the “Confirmation for Lost & Found” modal form indicating that the further instructions will be sent via email after the invitation is accepted by SELLERLOGIC.
Click “Next” to proceed.

Step 10. Summary for Lost & Found
The “Summary for Lost & Found” modal form confirms that your Amazon account has been successfully connected and enabled. It also provides information about all your Amazon accounts and marketplaces with the Lost & Found service enabled.

To proceed with the Lost & Found setup wizard, you may select:
- “Add existing account” to enable Lost & Found for another Amazon account that is already connected to the SELLERLOGIC Platform;
- “Add new account” to connect a new Amazon account to Lost & Found;
- “Finish” to finalize the setup process and start using Lost & Found.
Step 11. Limited User permissions
After your invitation is accepted by SELLERLOGIC, you will receive an email requesting you to provide the necessary user permissions to the newly added SELLERLOGIC user.
To manage permissions for SELLERLOGIC Limited User in Seller Central, follow these steps:
- Access Seller Central "Settings” > “User Permissions” page by clicking the link provided in the email from SELLERLOGIC and select "Manage permissions" for the SELLERLOGIC user.
- In the new window, when prompted whether the user can create reimbursements in your account, select "No" and confirm the setting by pressing the button below.
- Enable the four types of user permissions:
- Inventory > Manage FBA Inventory/Shipments – View & Edit
- Orders > Manage SAFE-T Claims – View & Edit
- Reports > Fulfilment Reports - View
- Settings > Manage Your Cases – View & Edit


To confirm that you have granted the necessary permissions, click the "Confirm permissions" button in the SELLERLOGIC email.
Step 12: Start using Lost & Found
Lost & Found requires some time to search for the cases associated with the newly connected account. During this search, the Lost & Found panel on the SELLERLOGIC Homepage will display the message “We are currently looking for new cases” with only the “Knowledge base” button available, providing a link to the given Lost & Found documentation.
Once new cases are found, you will be notified via email. After that, Lost & Found pages will become available for access via the SELLERLOGIC Homepage.
