The “Product dimensions import settings” page allows you to schedule import operations to automatically update product dimensions at regular intervals. You can set up the automatic import from external sources by creating and configuring your auto import settings.
To open the “Product dimensions import settings” page, navigate to Lost & Found navigation bar > Dimensions > Auto import settings.
Set up a new auto import
To set up a new auto import, follow these steps:
Step 1. Click the “Add” button with the plus icon at the top left;
Step 2. Set the auto import configurations in the “Create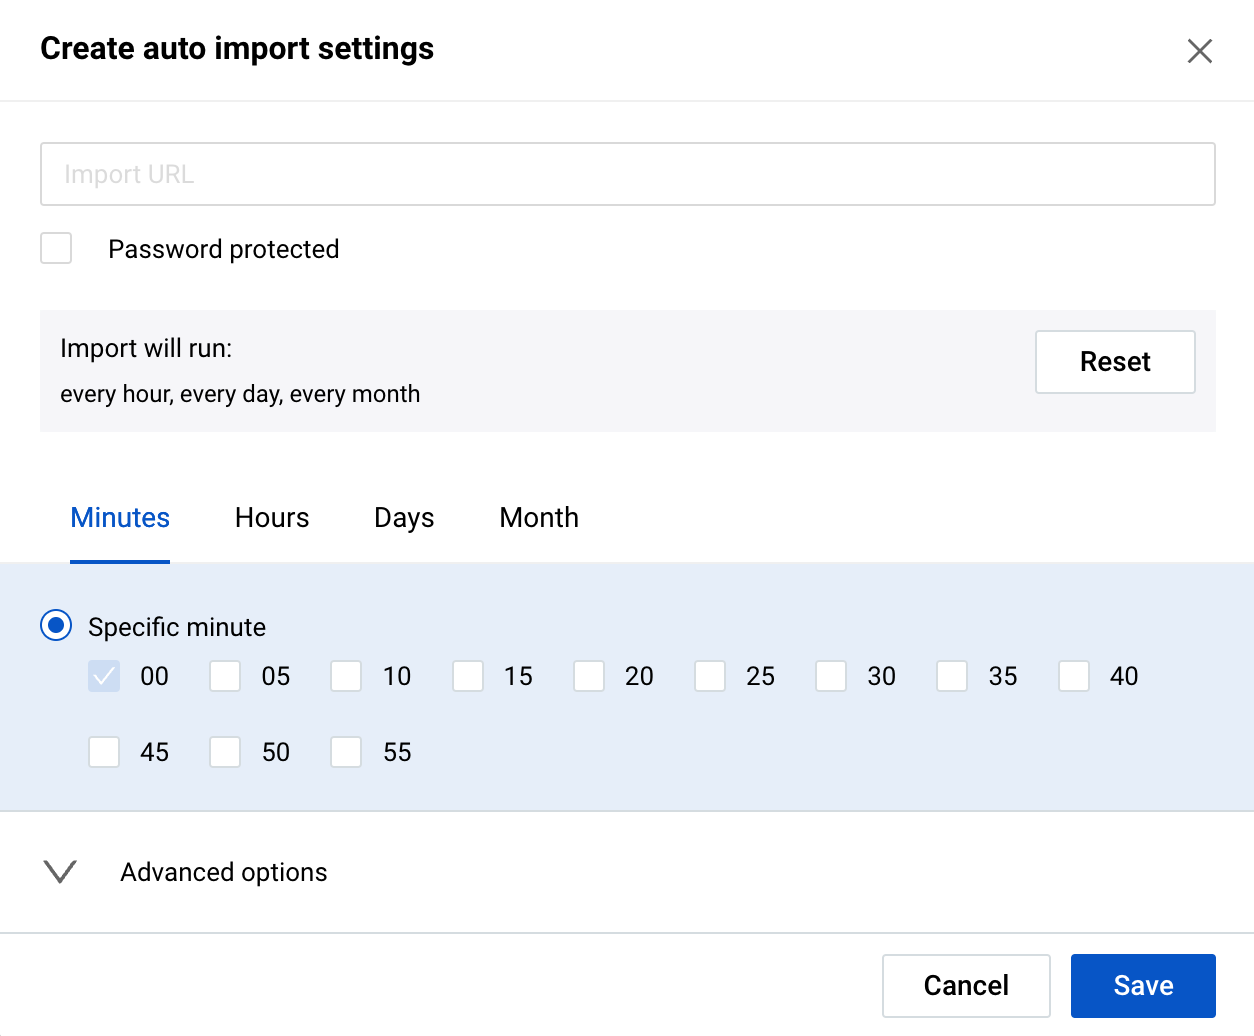 auto import settings” modal form according to the following fields and requirements:
Import URL: Enter a valid web address starting with either "http://" or "https://". This is the location from which the product dimensions data will be imported. Note: This is a mandatory field.
Password protected: Enable this option if your import source is password-protected and enter the corresponding login and password in the additional fields. Note: These fields are mandatory if the “Password protected” checkbox is checked.
Import will run: It displays the auto import scheduled periods. To restore the default period settings, click the “Reset” button. To change the schedule settings, switch between the following tabs and adjust their settings accordingly:
- “Minutes”: to specify the minutes;
- “Hours”: to specify the hours or select “Every hour”;
- “Days”: to specify the days or select “Every day”;
- “Month”: to specify months or select “Every month”.
Advanced options: They allow you to customize the import frequency further, per each of the time-period selections. To set the advanced import frequency open the corresponding tab (“Minutes”, “Hours”, “Days”, or “Month”), click on “Advanced options”, and use the radio button to select the frequency:
- “Every” – for the import to be executed every certain minute/hour/day/month starting from the defined point;
- “Every hour/day/month between” – for the import to be executed every certain hour/month within the selected time frames or every certain day starting from the defined day of the month.
Step 3. Once all the necessary information has been added and configured, click the “Save” button to finalize the automatic import configuration. This will create a new auto import schedule and enable the system to automatically import product dimensions according to the specified settings and schedule.
The results of the executed auto import operation can be viewed in the table of the “Dimensions import” page. For more information, see Lost & Found | Dimensions import.
Manage your auto import settings
The “Product dimensions import settings” page displays all your auto import settings. To update the auto import settings, click the settings icon within the corresponding auto import panel and make all the necessary changes in the “Update auto import settings” modal form that appears.The fields present in this form are identical to the ones described in the "Create auto import settings" form mentioned earlier.
Each auto import panel shown on the page provides the following options and information: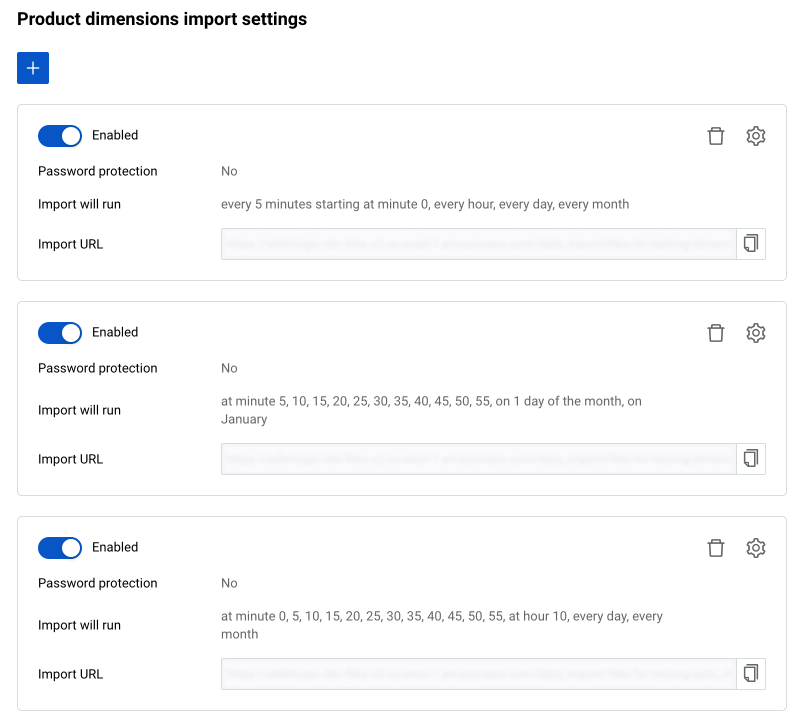
Enabled/Disabled: It indicates if the auto import is active and performs automatic imports according to the specified settings or not. Switch the toggle to activate or deactivate the auto import.
Password protection: It indicates whether the import file is password protected or not.
Import will run: It displays the scheduled frequency at which the import is executed.
Import URL: It displays the web address from where the import file is retrieved with an option to copy to the clipboard.
If you wish to remove the unnecessary auto import, select the “Delete” button with the trash bin icon within the relevant auto import panel and confirm your action.