La página de “Importar producto” muestra una tabla que lista todas las operaciones de importación, edición masiva y transferencia de configuraciones de productos en el Repricer iniciadas por los usuarios bajo tu cuenta de SELLERLOGIC. Estas operaciones se pueden iniciar desde las páginas de “Mis productos”, “Importar configuraciones de productos” o “Importación automática de configuraciones de productos”. También permite realizar una importación manual de configuraciones de productos al Repricer desde fuentes externas.
Se puede acceder a la página "Importar configuración de producto" de dos maneras:
- Página de inicio SELLERLOGIC > Repricer | Importar
- Barra de navegación Repricer > Importar / Exportar > Importar
Prerrequisitos
Para acceder a la página de “Configuraciones de importación de productos” y realizar la importación manual de configuraciones de productos, asegúrate de lo siguiente:
- Una suscripción activa de Repricer en el plan Trial, Starter o Advanced.
- Se conceden los siguientes permisos de usuario:
Repricer > Importar > ListaRepricer > Importar > Cargar archivoPara más información, consulta General | Gestión de usuarios | Gestionar permisos de usuario.
1. Campos de tabla
A continuación se muestra una tabla que enumera todos los campos disponibles en la página "Importar configuración de producto", junto con sus respectivas descripciones.
| Encabezado de la columna | Descripción | Filtro de encabezado de columna |
|---|---|---|
| ID | El número de identificación único asignado a la operación de importación para fines de referencia y seguimiento. | Búsqueda en vivo |
| Creado el | La fecha y hora en que se creó la importación. | |
| Tipo |
Tipo de operación de importación:
|
La lista desplegable |
| Configuración título | Nombre personalizado utilizado para identificar la configuración de importación automática del producto que ejecuta la operación de importación. Si no se proporciona un título, el sistema genera uno automáticamente (por ejemplo, Solicitado el: 2025-09-03 10:30:07). Para operaciones distintas a la importación automática, se muestra “N/A”. Información: Esta columna está oculta por defecto. Para mostrarla, abre el “Contenido de la tabla” y habilita la casilla correspondiente. | Búsqueda en vivo |
| Estado |
Estado actual de la operación de importación:
|
La lista desplegable |
| Número de productos | El número total de filas con datos de producto incluidos en el archivo de importación. | Búsqueda en vivo |
| Número de líneas con errores | Número de filas que contienen errores. | Búsqueda en vivo |
| Número de líneas importadas | El número de filas con datos de productos que se importaron correctamente. | Búsqueda en vivo |
| Fecha de inicio | La fecha y hora en que se inició la operación de importación. | |
| Fecha de fin | La fecha y hora en que se completó la operación de importación. | |
| Fecha de actualización | Fecha y hora de la última modificación. Información: Esta columna está oculta por defecto. Para mostrarla, abre el “Contenido de la tabla” y activa la casilla correspondiente. |
2. Realizar importación manual
Para importar manualmente los datos de configuración de productos al Repricer, sigue estos pasos:
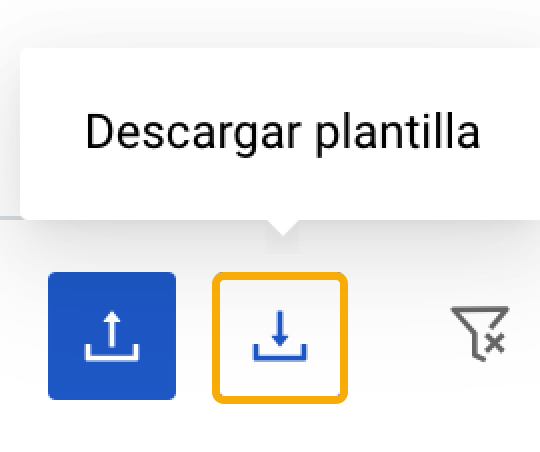
Paso 1. Haz clic en el botón “Descargar plantilla” (icono de flecha hacia abajo) para descargar la plantilla de importación en tu PC. La plantilla de Excel generada (XLSX) incluye definiciones de campo, valores válidos y ejemplos. Está localizada en el idioma de la interfaz seleccionado en el "Menú de usuario”.
Paso 2. Abre la plantilla de importación descargada utilizando un programa de hojas de cálculo. Revisa la estructura de la plantilla, incluyendo las columnas y encabezados, que representan los campos de datos para la configuración del producto en cada una de las pestañas de la plantilla:
- Definiciones de datos: Instrucciones para completar la pestaña “Template”;
- Plantilla: pestaña principal para introducir los datos de configuración del producto que deseas importar;
- Ejemplo: Valores de muestra para cada columna.
- Valores válidos: Opciones del menú desplegable para los campos de la plantilla.
Paso 3. Completa la pestaña de “Template” con los datos de configuración del producto que deseas importar al Repricer. Asegúrate de seguir el formato y las pautas requeridas especificadas en la pestaña de “Data definitions”.
Paso 4. Después de que se haya completado la plantilla de importación con los datos necesarios, guarda el archivo en el formato de archivo requerido: texto delimitado por tabulaciones (TSV) o valores delimitados por punto y coma (CSV).
Paso 5. Regresa a la página de "Configuraciones de importación de productos" y haz clic en el botón “Subir archivo” (ícono de flecha hacia arriba) en la parte superior izquierda. Selecciona el archivo de importación guardado previamente en tu PC haciendo clic en el botón “Elegir archivo”. Después de adjuntar el archivo, haz clic en “Subir”.
Advertencia: Si el archivo de importación tiene un formato de archivo incorrecto o faltan los campos requeridos, aparecerá el mensaje de advertencia correspondiente. Revisa el mensaje y realice las correcciones necesarias en su archivo de importación. Repite el proceso de carga para el archivo de importación corregido.
Paso 6. Una vez que se inicie la importación, aparecerá una nueva entrada en la tabla etiquetada como "Importación manual". La entrada se puede eliminar del sistema solo mientras el estado de la operación sea "Nuevo" haciendo clic en el ícono de la papelera.
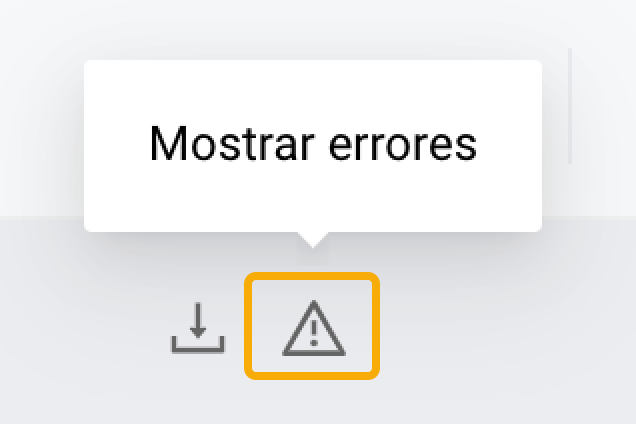
Paso 7. Si ocurren errores durante la operación de importación, el sistema lo indicará con un ícono de error. Haga clic en el botón “Mostrar errores” (ícono de error) para acceder al informe detallado de errores.
Info: Para descargar el archivo de importación, haz clic en el botón "Descargar" ubicado al principio de la fila correspondiente. Los archivos de importación se pueden descargar hasta que la entrada correspondiente permanezca en la tabla. Ten en cuenta que la capacidad de almacenamiento de esta tabla es de 20 archivos por cliente. Cuando se inicie una nueva operación que supere el límite de 20 entradas, la entrada más antigua se eliminará automáticamente de la tabla y ya no estará disponible para su descarga.
3. Errores de revisión
Si el ícono de error aparece junto a la entrada de la tabla, haz clic en él para abrir el modal correspondiente y revisar el informe de error detallado. Dependiendo del tipo de operación, se abrirá el formulario modal de “Errores de edición masiva de productos” o “Errores de importación de productos”.
El modal de "Errores en la edición masiva de productos" presenta información detallada sobre los errores que ocurrieron durante la edición masiva iniciada en la página "Mis productos". Para más información, consulta Repricer | Mis productos | Edición masiva.
- Error: Tipo de error.
- Productos: IDs de productos que no fueron actualizados durante la operación. Hacer clic en un ID abre el panel de configuración del producto.
Alternativamente, puedes cambiar a la pestaña “Productos” del modal “Errores de edición masiva de productos” que lista los IDs con conteos de errores. Al pasar el mouse sobre el número de error, se abre un tooltip que explica el error de cada campo.
El modal de "Errores de importación de productos" presenta información detallada sobre los errores que ocurrieron durante la operación de importación manual o automática de productos. Permite identificar los errores específicos que impidieron que ciertos productos fueran importados.
- Campo: Columna que contiene el error.
- Error: Tipo de error.
- Número total de líneas: Número de filas (productos) con este tipo de error.
- Primeras 100 líneas: Números de fila (de las primeras 100) con este tipo de error.