The “Manage user” page displays a table with the details of all users associated with your customer account. It serves as a central hub for managing user information and roles. The page can be accessed in two ways:
- SELLERLOGIC navigation bar| Gear icon > Users
- SELLERLOGIC Homepage > Settings | Manage user
Table fields
Below is a list of all fields available in the "Manage user" table, along with their respective descriptions.
| Column header | Description | Column header filter |
|---|---|---|
| ID | The unique identifier assigned to each user within the system. | Live search |
| First name | The user's first name. | Live search |
| Last name | The user's last name. | Live search |
| Phone | The user's phone number. | Live search |
| The email address associated with the user. | Live search | |
| Role |
Specifies the role type assigned to the user, determining their level of permissions and access. It can be one of the following:
To view and manage the user’s permissions, click on the role type. For more information, see SELLERLOGIC | User profile. |
Dropdown list |
| Two-factor authentication | Indicates whether two-factor authentication (2FA) is currently activated for the user. | Dropdown list |
Table options
Each column header provides “Ascending” and “Descending” sorting options as well as individual filtering of data upon a click on the column header filters as provided in the table above.
The “Table settings” and “Table content” buttons, located at the lower right of the page, enable you to customize the view and content of the page table. The “Table content” modal form allows you to manage the columns of the table, by changing their respective order or visibility status. For more information, see SELLERLOGIC | Common service features.
The “Export results” button, represented as an up arrow icon at the top right of the page, enables the export of all fields with data from the first table page. By clicking this button, you can export up to 100 table rows in CSV, XLS, or XLSX file formats.
Invite new users
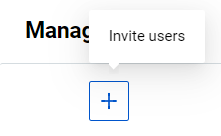
To add new users to your account, send the invitations by clicking the “Invite users” button with the plus icon at the top left. Provide the personal details of the new users and click “Invite”. You can send invitations to up to ten users simultaneously. To add more fields for inviting additional users, click the plus icon.
Once the invitations are sent, new entries will appear in the “Manage users” table displaying the details of each invited user. These invited users are automatically granted the "Invited User" role until they complete their registration.
Info: By default, invited users will have the same language setting for the SELLERLOGIC Platform interface as the user who sent the invitation.
The invited users will receive a confirmation request sent to the email address specified within the “Invite users” form. By clicking the “Confirm” button in the email, they will be redirected to the registration page, where they can provide their personal details and complete the registration process.

If the invitation email is lost or missing, click the “Re-send invitation” button at the beginning of the relevant table line.
Update user details and roles
To make changes to user details or manage their roles, open the “User profile” page by clicking the “Update” button with the pencil icon at the beginning of the relevant table line. For more information, see SELLERLOGIC | User profile.
Delete user
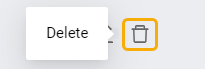
If you need to remove a user from the system, select the “Delete” button with the trash bin icon at the beginning of the relevant table line and confirm your action.