The "Dimensions import" page presents a table with a list of all import operations initiated by the users under your account on the “Dimensions import” or “Product dimensions import settings” pages. It also allows you to perform a manual import of product dimensions to Lost & Found from external sources.
To access the "Dimensions import" page, navigate to Lost & Found navigation bar > Dimensions > Import.
Table fields
Below is a table listing all fields available in the "Dimensions import" table, along with their respective descriptions.
| Column header | Description | Column header filter |
|---|---|---|
| ID | The unique identification number assigned to the import operation for reference and tracking purposes. | Live search |
| Type |
The type of import operation performed. It can be one of the following: Auto import: An automatic import operation scheduled on the “Product dimensions import settings” page. Manual import: An import operation created manually by uploading a file on the “Dimensions import” page. |
Dropdown list |
| Status |
The current status of the import operation. It can be one of the following: New: The file has been uploaded but not yet processed. In progress: The import is currently underway. Done: The import has been completed successfully. No items: The import file contains no valid data. |
Dropdown list |
| Number of products | The total number of rows with product data included in the import file. | Live search |
| Number of rows with errors | The number of rows with product data in the import file that contain errors. | Live search |
| Number of imported rows | The number of rows with product data that were successfully imported during the operation. | |
| Start date | The date and time when the import operation was initiated. | |
| End date | The date and time when the import operation was completed. | |
| Updated | The date and time when the last change or modification was made to the import settings or file. | |
| Created on | The date and time when the import was created. |
Table options
Each column header provides “Ascending” and “Descending” sorting options as well as individual filtering of data upon a click on the column header filters as provided in the table above.
The “Table settings” and “Table content” buttons, located at the lower right of the page, enable you to customize the view and content of the page table. The “Table content” modal form allows you to manage the columns of the table, by changing their respective order or visibility status. For more information, see SELLERLOGIC | Common service features.
The “Export results” button, represented as an up arrow icon at the top right of the page, enables the export of all fields with data from the first table page. By clicking this button, you can export up to 100 table rows in CSV, XLS, or XLSX file formats.
Perform manual import
To perform the manual import of product dimensions to Lost & Found, follow these steps:

Step 1: Download the import template by selecting the “Download template” button with the down-arrow icon at the top left.
Step 2: Open the downloaded import template using a spreadsheet program. Review the columns and headers, which represent the data fields for the product dimensions on each of the template tabs:
- “Data definitions” includes the instructions for filling out the columns of the “Template” tab;
- “Template” is the main tab to be filled out with the data you want to import;
- “Example” provides examples of values for each column;
- “Valid values” provides the values offered in the dropdown lists of the “Template” tab columns.
Step 3: Fill out the “Template” tab with the data you want to import to Lost & Found. Ensure that you follow the required format and guidelines specified on the “Data definitions” tab.
Step 4: After you have filled out the import template with the necessary data, save the file in the required file format: Tab-delimited text (TSV) or Semicolon-delimited value (CSV).
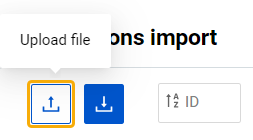
Step 5: Return to the "Dimensions import" page and select the “Upload file” button with the up-arrow icon at the top left. Select the previously saved import file by clicking the “Choose file” button. After attaching the file, click “Upload”.
Note: If the import file is of the wrong file format or has the required fields missing, the relevant warning message appears. Review the message and make the necessary corrections to your import file. Repeat the upload process for the corrected import file.
Step 6: Once the import is launched, a new entry will appear in the page table labeled as "Manual import".
Info: You may delete the import file from the system only while the status of the import is “New” by clicking the trash bin icon button at the beginning of the corresponding table line.
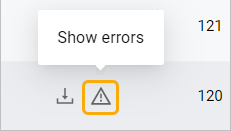
Step 7: If there are any errors in the import operation, the system will indicate it with an error icon at the beginning of the corresponding table line. Click the “Show errors” button with the error icon to open the “Dimensions import errors” modal form with the detailed error information. Review the error messages to determine what product dimensions have not been imported.
By following these steps, you can import product dimensions to Lost & Found using the provided import template. Successfully imported data will be available on the “Dimensions” page.
Tip: By selecting the “Download” button at the beginning of the corresponding table line, you may download your import file at any time.
Review errors
 If the error icon is shown for a certain import operation, click it to open the “Dimensions import errors” form and review the data that was not imported during the operation.
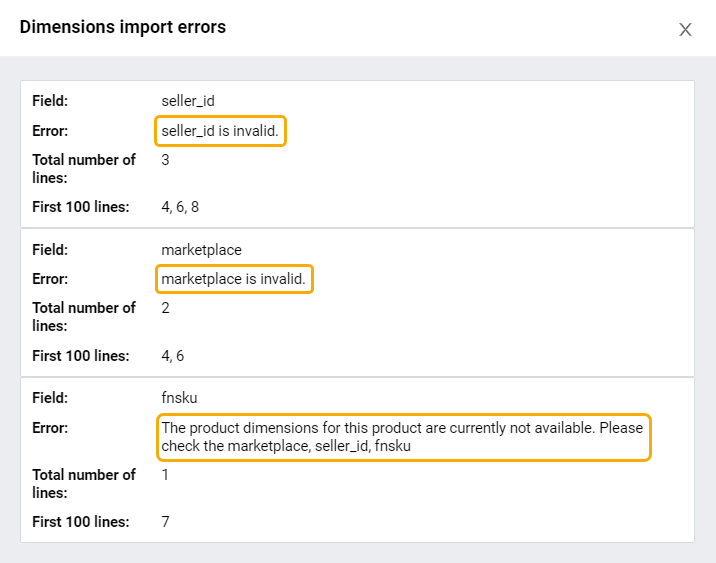
The form displays detailed information related to import errors and allows you to identify the reason that prevented the data from being imported.
Field: The name of the column with the error;
Error: The type of the error;
Total number of lines: The total amount of rows with this type of error;
First 100 lines: The sequence numbers of the rows with this type of error from among the first 100 rows of the import file.