The “API settings” page allows you to configure and manage the setup of the SELLERLOGIC API within your account. To access the page navigate to SELLERLOGIC navigation bar | Gear icon > API settings.
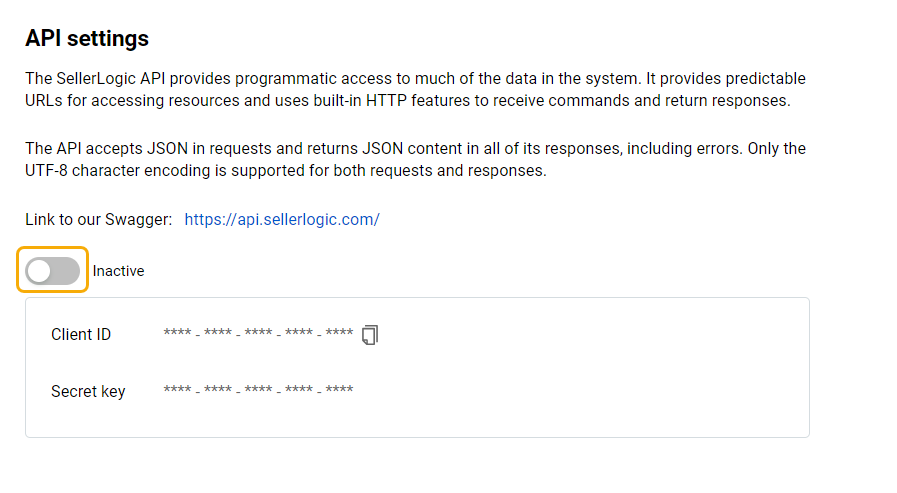
Link to SELLERLOGIC API: https://api.sellerlogic.com/
Set up SELLERLOGIC API
To set up SELLERLOGIC API, follow these steps:
Step 1. Click the "Accept" button to agree to the API License and Terms of Use for Users of the SELLERLOGIC Service and click “Next”.
After accepting the "Terms & conditions Agreement," you can obtain a signed copy of the agreement in PDF file format by clicking the "Download" button.
Step 2. To ensure security, complete the two-factor authentication (2FA) by entering the verification code provided by your authentication app and clicking the "Confirm" button.
If you have not enabled 2FA for your account, an error message will appear, indicating that 2FA is not active. To enable 2FA for your account, select "Setup two-factor authentication". This will open the "Security settings" tab, where you can configure and enable 2FA. For more information, see SELLERLOGIC | Security Settings.
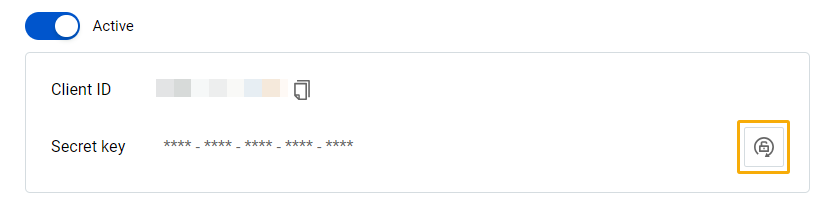
Step 3. To activate API settings and acquire the "Client ID" and "Secret key" required for API access, toggle the "Inactive" option to "Active”.
Generate a new secret key
To generate a new secret key, click on the “Generate new secret key” button and confirm the action by selecting “Generate”. The system will prompt you to complete your 2FA by entering the verification code.
Note: Changing your secret key will render your current key invalid for all operations where it is utilized. You will need to update any references to the old key with the newly generated one.