The bulk edit operation allows you to apply changes to multiple products at once. You can select multiple products from the “My products” table and update their settings just as you would in the individual product settings form.
Selecting products
Before applying bulk changes, you must first select the products. They can be selected using the following methods:
- Individual selection: Check or uncheck the box next to each product in the table.
- Page bulk selection: Check/uncheck the checkbox in the column header row to select/deselect all products on the current page.
- Dropdown menu options: Click the arrow icon to access more selection options:
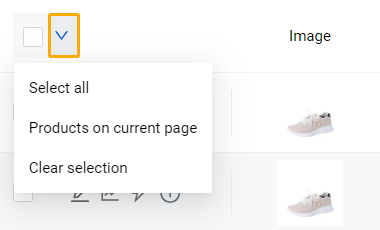
- "Select all”: Select all products from all the pages of the table, taking into account applied column filters.
- “Products on current page”: Select all products from the current page, taking into account applied column filters.
- “Clear selection”: Deselect all previously selected products.
Product bulk edit form
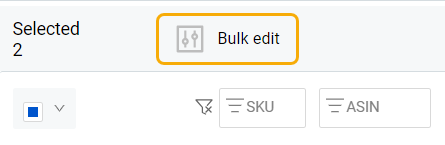
Once you have selected at least one product from the “My Products” table, the “Bulk edit” button will appear in the table header. Follow these steps to bulk edit the selected products:
- Click the “Bulk edit” button to open the “Product bulk edit” form.
- Navigate to the product settings fields that need to be updated.
- Choose a bulk action from the arrow dropdown menu to be applied to these settings.
- Click “Apply” at the bottom of the "Product bulk edit” form.
Note: Changes to any of the fields below will overwrite your current product settings. This action is irreversible and will overwrite all existing configurations for the respective products.
Bulk actions
The “Product bulk edit” form provides several actions for each product settings field. Below is a list of all actions available within the “Product bulk edit” modal form, along with their respective descriptions.
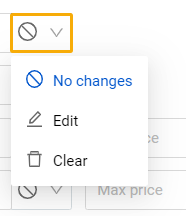
No changes: This default option indicates that no changes will be applied to the chosen field for all selected products.
Edit: This option is automatically applied to fields with updated values. The new value will be applied to this product setting for all selected products.
Clear: Use this option to manually remove the field value assigned to the selected products. This status is available only if some of the selected products have data assigned for this particular setting.
Product settings
The "Product bulk edit” form offers a list of product settings that can be updated in bulk. These settings are identical to those described in the product settings form and are applied in the same manner. For more information, see Repricer | My products | Product settings form.
Common product settings
Below is a list of all product settings that can be applied to the product irrespective of its offer type.
Fee calculation | Net purchase price | Amazon referral fees (%) | VAT (%) | Other fees | FBA fees / Shipment fee | Recommended retail price | Former selling price
Additionally, the "Product bulk edit" form provides fields for managing product tags and comments in bulk:
- Assign tag: Select one or more tags from the dropdown list to be assigned to the selected products. Alternatively, create a new tag by clicking the plus icon.
- Remove tag: Select one or more tags from the dropdown list to be removed from the selected products.
- Product comment: Write a text comment to be added to the selected products.
Offer type-specific settings
Reset product offer
The “Reset product offer” field controls whether product offer data is removed from Repricer when the corresponding Repricer service is disabled. Please note that after resetting the product offer, the system checks for offer settings on Amazon for this product and will re-upload the data to Repricer within a few hours (minimum 2 hours) after the reset.
- On: Select this option to remove all data related to the product offer from Repricer when the corresponding Repricer service is disabled. Note: All offer type-specific fields will be cleared and disabled for editing. Only one offer type (B2C or B2B) can be reset for a product at a time. When the reset is enabled for one offer type, the corresponding field for the other offer type will be disabled.
- Off: Select this option if you want to enable the current product offer and retain the ability to manage its settings within Repricer, as long as the corresponding Repricer service is enabled.
Bulk product configuration
Below is a table listing the product settings fields that must be configured separately for each offer type on a dedicated tab of the product settings form – "B2C" or "B2B".
| Field | Settings |
|---|---|
| Standalone price | To update the value, enter a new value in the input field. The entered value must be greater than 0. |
| Min price / Max price |
To update the value for the "Min price” or "Max price”, select one of three approaches in the corresponding field:
1. Automatic: for the price to be automatically calculated based on the net profit of the purchase price. The value of the net profit of the purchase price has to be specified within the “Min price” / “Max price” input field and can be of two types:
Note: The automatic “Min price” / “Max price” value calculation requires the “Net purchase price” and the “Amazon referral fees (%)” values to be provided. Products without these requirements will be ignored during the bulk operation and their “Min price” / “Max price” values will remain unchanged.
2. Value: for the price to be provided manually. The new value of the desired minimum/maximum price has to be specified in the “Min price” / “Max price” input field. Note: The “Min price” value must be less than the “Max price” value. The difference between these values must be at least 0.01.
3. Calculate now: for the price to be automatically calculated based on customized parameters which include:
Example 1: If you apply the following parameters – Example 2: Having applied the following parameters – |
| Product group |
To assign a product to a specific product group, select the relevant group from the dropdown list. Selecting the empty field (the first one in the dropdown list) will leave this product unassigned to any of the groups.
Alternatively, you can create a new product group directly within the form by clicking the plus icon next to the “Product group” field. Enter the name of a new group in the “Title” field and select an optimization strategy template from the “Strategy template” dropdown menu (optional). For more information, see Repricer | Products | Product group. |
| Optimization active |
Enable or disable the “Optimization active” status for the currently opened offer type of the selected products. If you select “On” to enable the optimization, the additional fields will appear prompting you to specify the optimization strategy template and its configuration. To learn more, see Repricer | My products | Product settings form | Optimization active.
Warning: Before enabling the optimization, make sure that all of the selected products have “Min price” and “Max price” values assigned. Products without this requirement will be ignored during the bulk edit operation and their optimization status will remain “Off”. |
Note: In order to apply changes to the product settings specific to B2C or B2B offer type, ensure that you have the corresponding Repricer service enabled.
Quantity discount for B2B offers
The "Quantity discount” section for your B2B offers allows you to configure the price reductions for the selected products based on the quantity of products to be purchased.
To apply a quantity discount to the product, select the type of discount calculation with the help of a radio button, click the "Set prices” button, and fill out the fields accordingly:
Percent of business price: To reduce the price by a specified percentage of the base price. Provide the following parameters to enable the discount:
- “Minimum quantity”: Specify the minimum quantity of products required to activate the discount.
- "% Off": Determine the percentage reduction applied to the base price.
Fixed prices: To assign a specific discounted price per unit. Provide the following parameters to enable the discount:
- “Minimum quantity”: Specify the minimum quantity of products required to activate the discount.
- “Price per unit”: Specify the exact discounted price per product unit.
Up to 5 separate quantity discount settings can be configured for the selected products. Click "Set prices” to add more table entries or use the trash bin icon to remove the unnecessary ones.
Note: Discounted prices are not restricted by the minimum price and may fall below it. The minimum price is applied only to the value in the “Price” field of your B2B product offer.
Confirm bulk edit
The "Confirm bulk edit" form appears upon a click on the “Apply” button in the “Product bulk edit” form. It serves as a confirmation step before applying changes to multiple products through bulk editing. Before proceeding with the bulk edit, you are encouraged to read through the summary of the changes provided by the form.
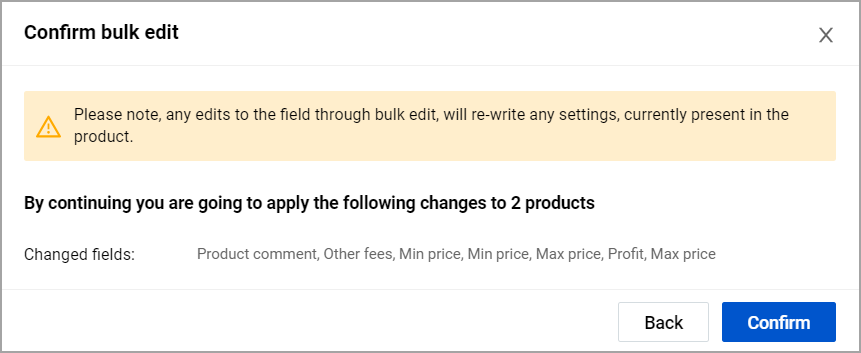
This form ensures that you understand the consequences of performing a bulk edit and presents the fields that will be updated, along with the number of products affected. Once you have acknowledged all the changes to be made, you can either proceed by selecting "Confirm" or go back to the "Product bulk edit" form without applying the bulk edit.
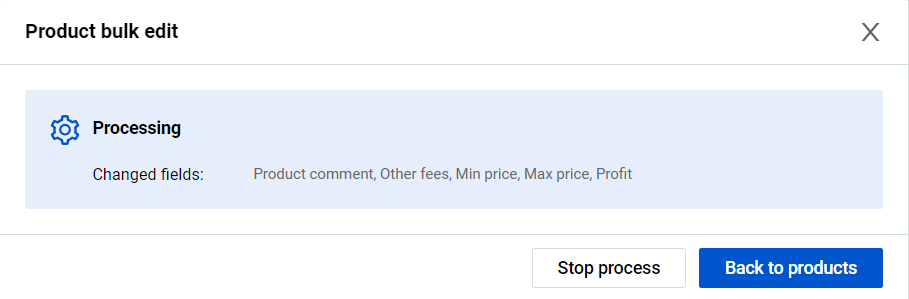
If you choose to confirm the changes, the system will start processing the data and a corresponding message form will appear. Note: The bulk operation can be canceled by clicking the “Stop process” button during data processing, but some changes may still be partially or completely applied.
Once the data processing is completed, the relevant message form will appear. This form includes the error log containing information about any products that were not updated during the operation, if applicable.
Errors occur when the changes submitted in the “Product bulk edit” form have not passed the system's validation. Each field of the “Product bulk edit” form undergoes validation in the same manner as when applying changes within the product settings form.
You can review the errors directly in the form by hovering over the product ID or accessing bulk operation details on the “Import product settings” page.
Access bulk operation details
To review the details of the completed bulk edit operation, go to the “Import product settings” page and locate the table entry corresponding to the needed operation, labeled as “Bulk edit” type. Click on the error icon at the beginning of the relevant line to open the “Product bulk edit errors” form and access detailed error information. For more information, see Repricer | Import product settings.