Account registration is required to access the SELLERLOGIC Platform and its services. To register a new SELLERLOGIC account, follow the registration steps described below.
Step 1: Initiate registration
- Go to the SELLERLOGIC website.
- Navigate to the authorization menu at the top right and click “Register”. This will launch the account registration process.

Alternatively, registration can be initiated by selecting “Sign up” on the “Log in” page.
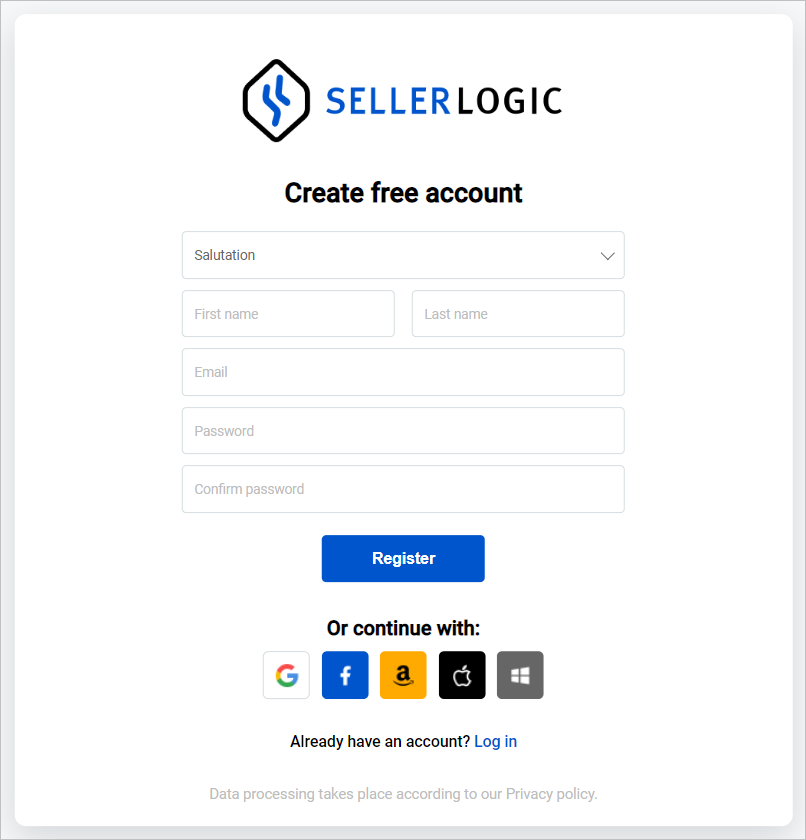
Step 2: Create free account
Fill out the fields in the “Create free account” modal form by entering your personal details. Alternatively, you can choose to register using your Google, Facebook, Amazon, Apple, or Microsoft accounts. Once you have entered your information, click the "Register" button to complete the registration.
Note: The password must be a minimum of 12 characters long and contain at least one uppercase, one lowercase letter, one numeric character, and one special character. For more information, see SELLERLOGIC | Information | Password rules.
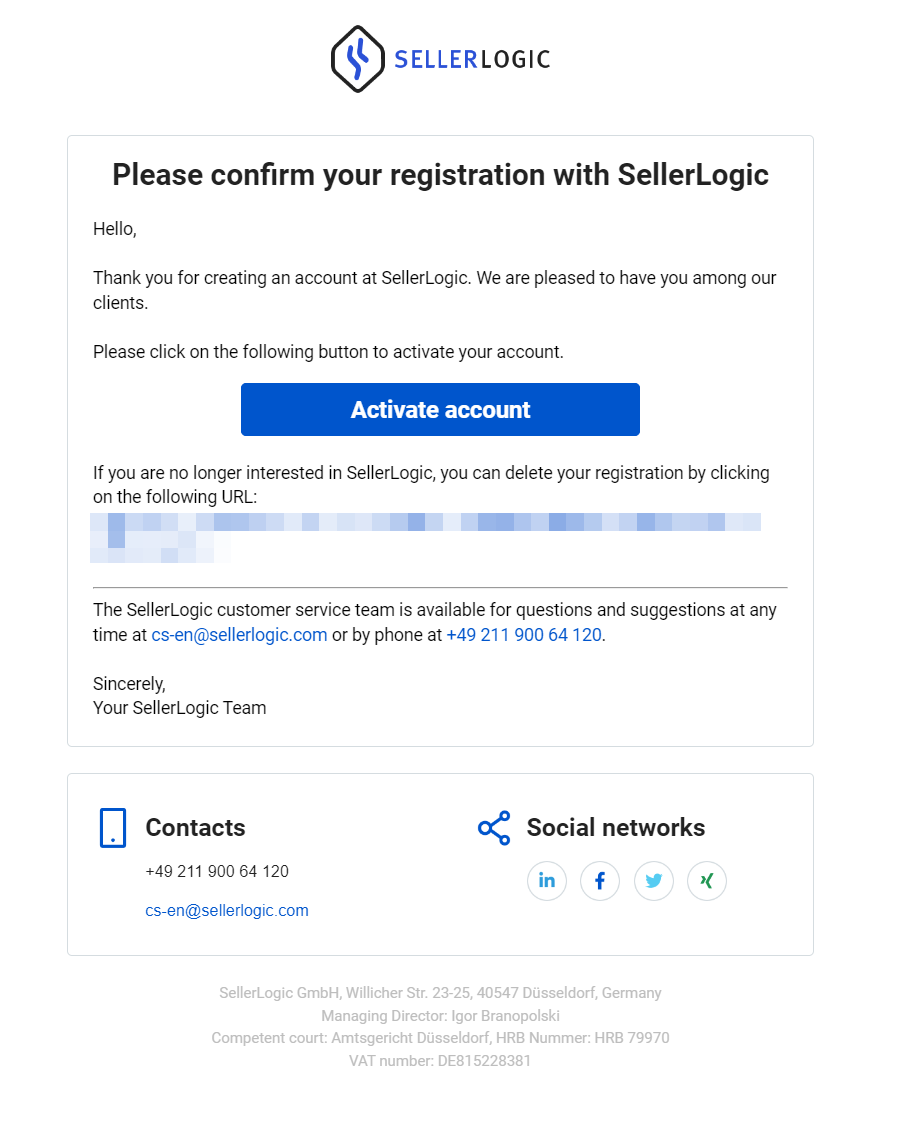
Step 3: Confirm registration
Upon successful registration, a confirmation message will be displayed, indicating that your registration process is now complete. To finalize your registration and activate your account, please proceed to your email inbox. Look for a confirmation email and click the "Activate account" button.
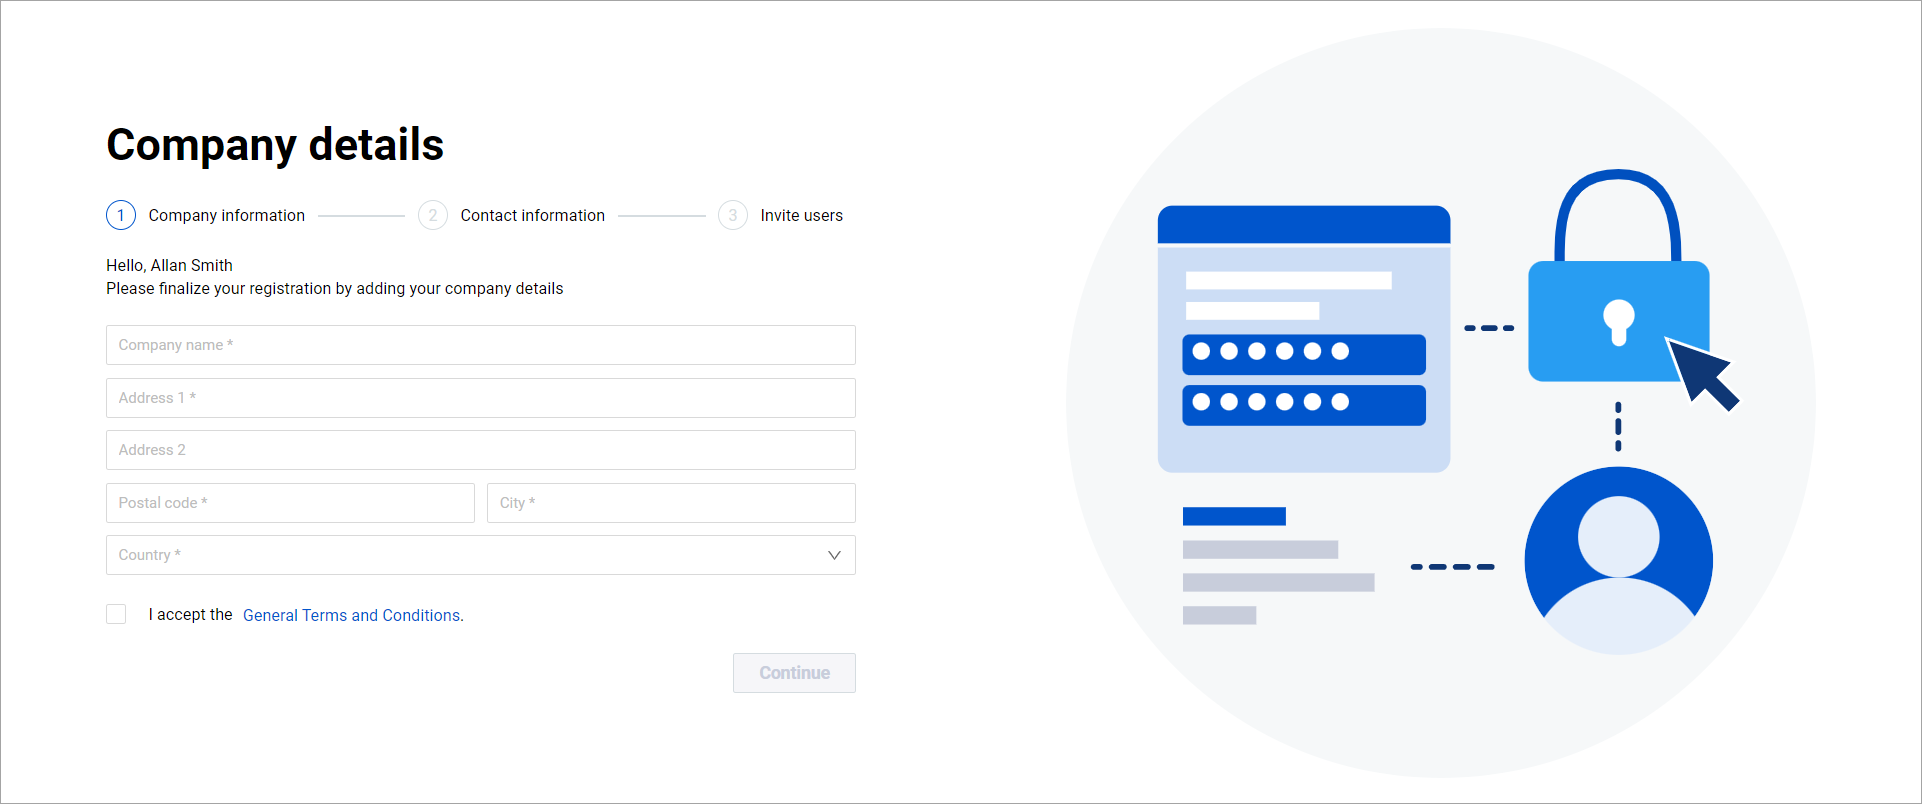
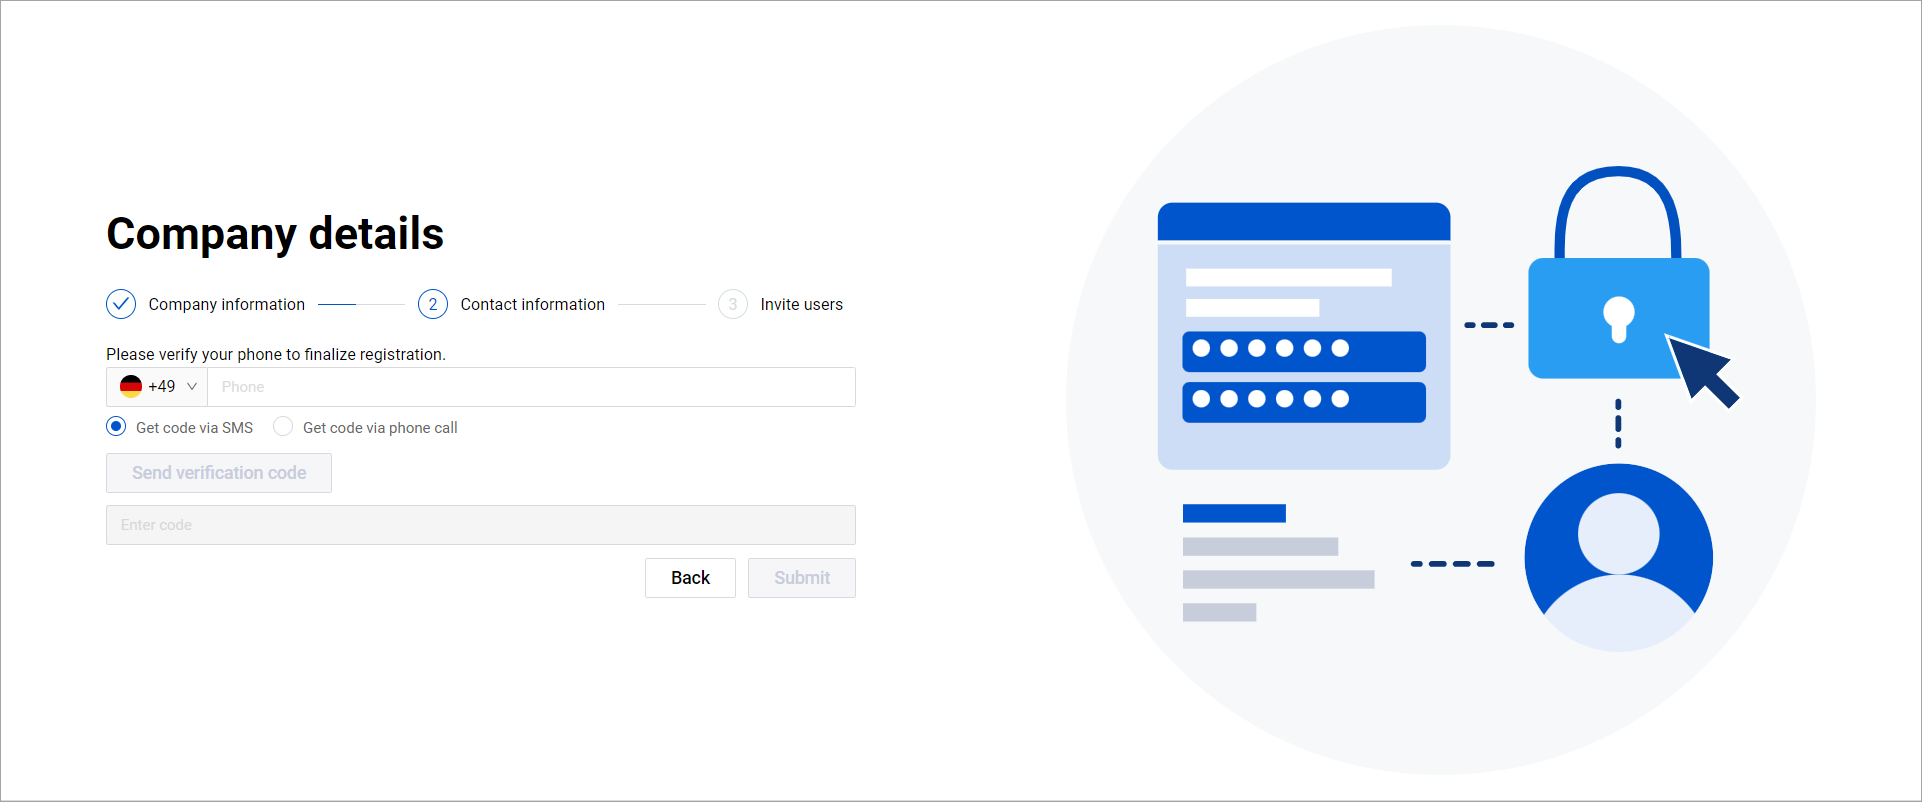
Step 4: Provide company details
After confirming the registration, you will be prompted to provide your company’s details. To proceed with the registration, fill out all the required fields provided by the “Company details” page, accept the “General Terms and Conditions”, and click “Continue”.
Next, provide your contact phone number for verification, by following these steps:
- select the country code from the dropdown menu;
- enter your phone number;
- select the verification option – “Get code via SMS” or “Get code via phone call”;
- click “Send verification code”;
- enter the received verification code in the “Enter code” field;
- click “Submit”.
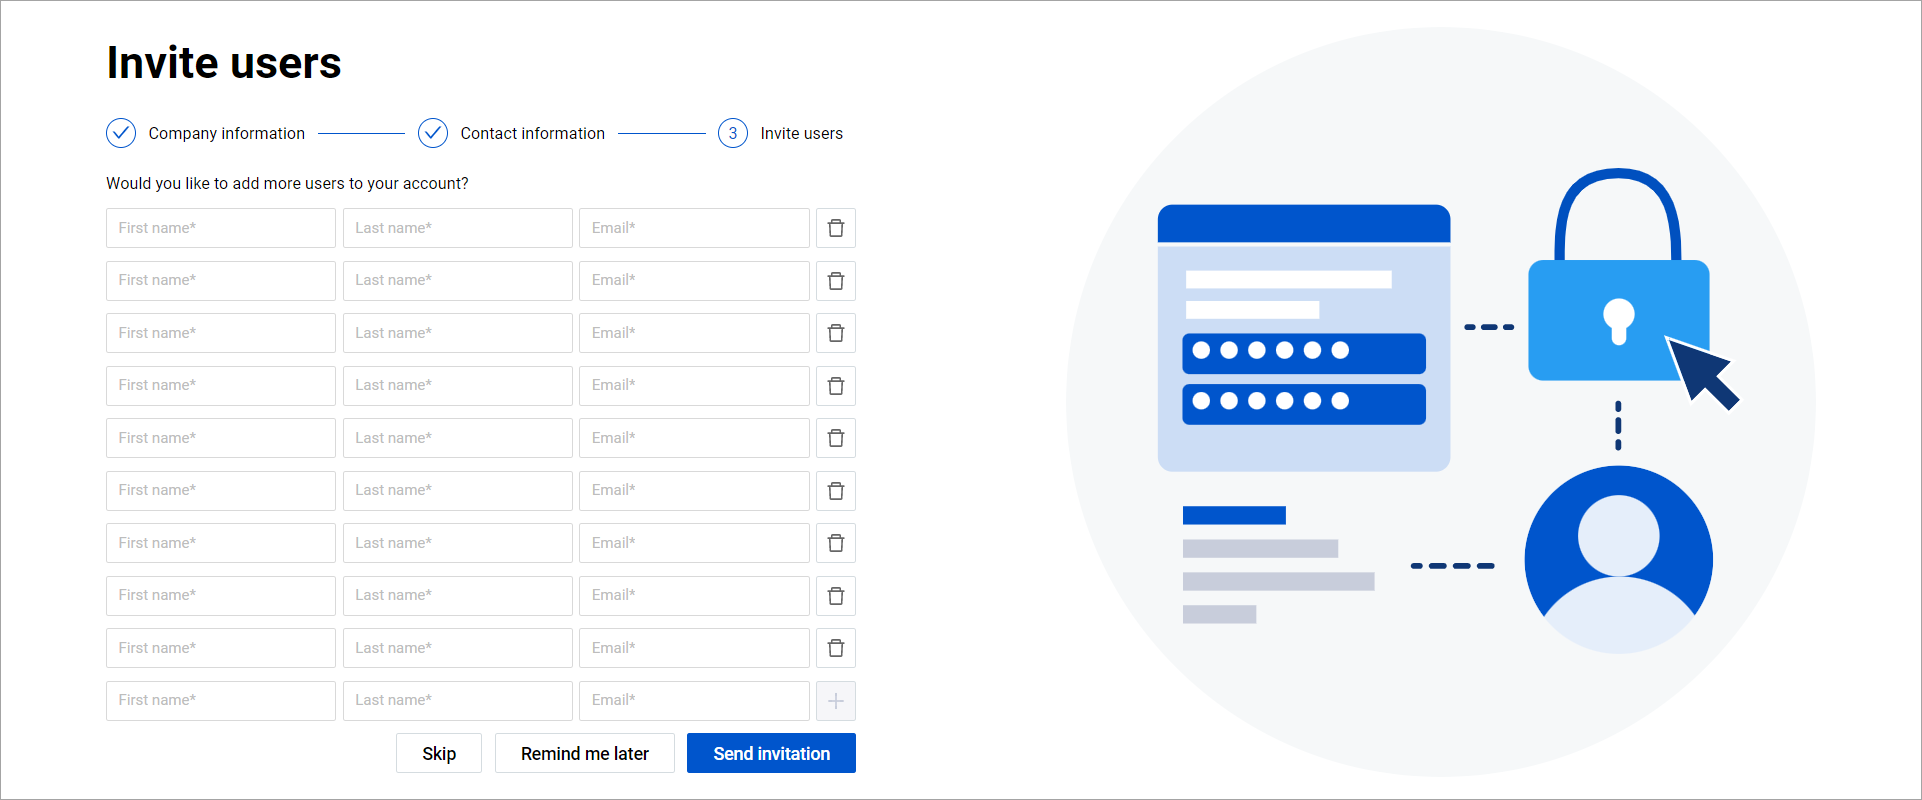
Step 5: Invite users
The “Invite users” page allows adding new users to your customer account right away. This is an optional step, which can be skipped by clicking the “Skip” or “Remind me later” buttons.
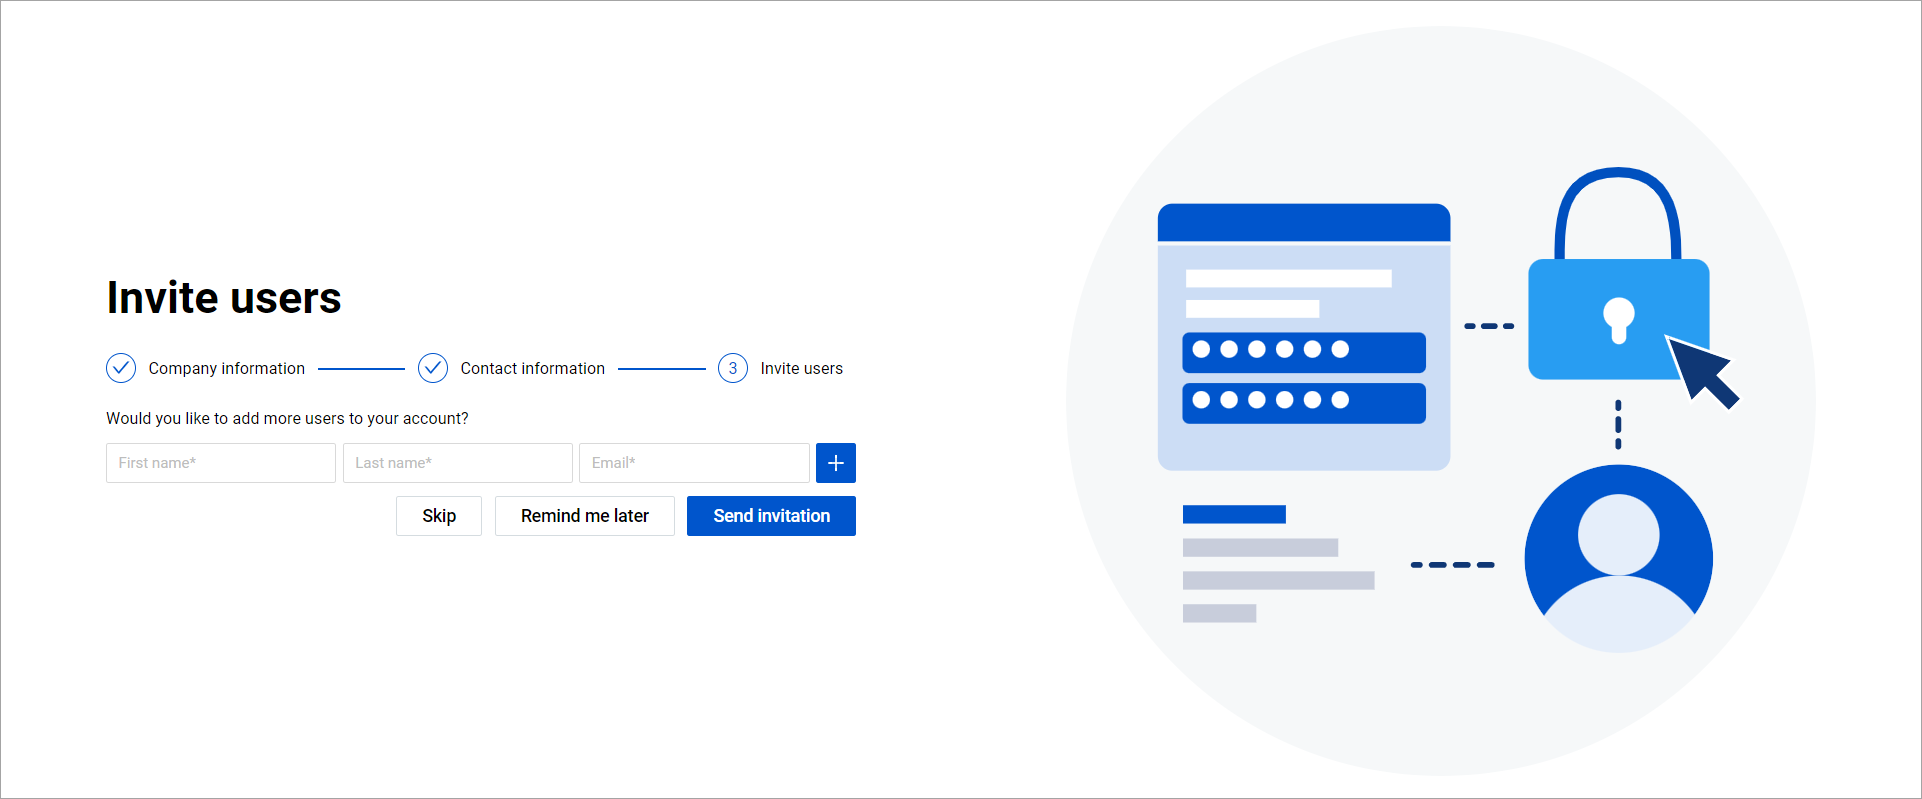
To add new users directly from this page, send the invitations by providing their personal details and clicking “Send invitation”. You can send invitations to up to ten users simultaneously. To add more fields for inviting additional users, click the plus icon. For more information, see SELLERLOGIC | Manage user | Invite new users.
Step 6: Start using the Platform
Once all the information is provided, the account will be activated and you will be redirected to the SELLERLOGIC Homepage, where you can set up one or more services offered by the SELLERLOGIC Platform. For more information, see SELLERLOGIC | Homepage.